Configuring Keycloak
The keycloak authentication enables single sign-on authentication to the application. This section provides the details on how to set up the keycloak server and configure the keycloak client.
Setting up Keycloak Server
To set up the Keycloak server,
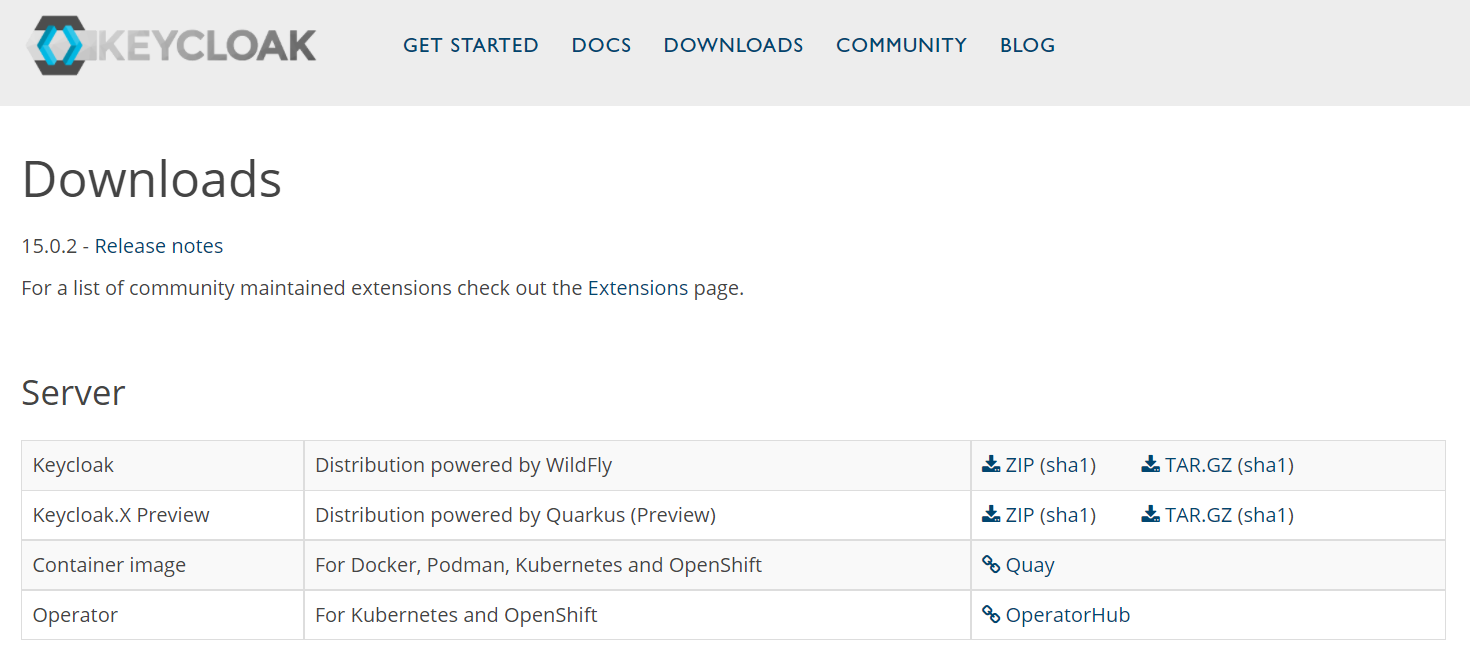
- Go to https://www.keycloak.org/downloads folder and download the latest ZIP file from the server section, and extract the same.
- Go to \keycloak-11.0.3\standalone\configuration.
- Open standalone.xml and modify the ports (as highlighted in the below screen capture). This port is different from that of the Fabric and Application server.

- Go to <Keycloak_Installation_Folder>\bin and run the standalone.bat file to start the JBoss server. The Keycloak is set up successfully.
Configuring Keycloak Client
To configure Keycloak client,
- Start the JBoss server and open the Keycloak web application using http://localhost:8180/auth/.
- Login to the administration console as admin/admin.
- Create a new client for the Temenos Workbench application that needs to be authenticated through Keycloak.
- Open Keycloak and click Add realm.
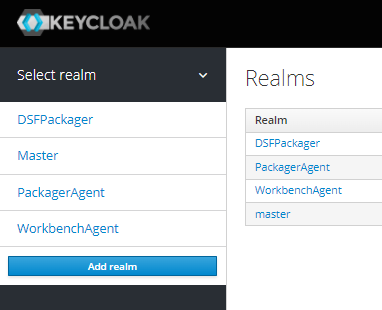
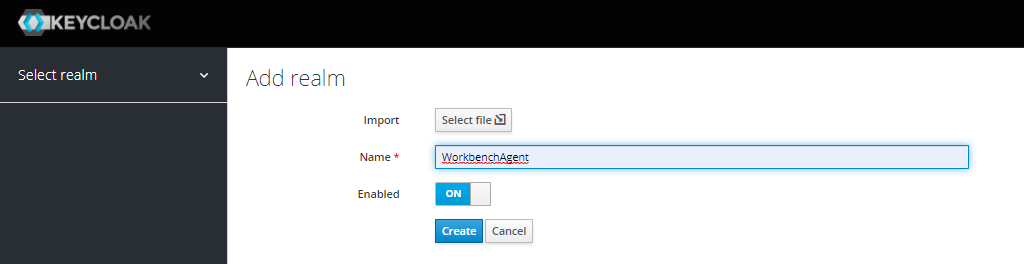
- Enter WorkbenchAgent in Name and click Create.
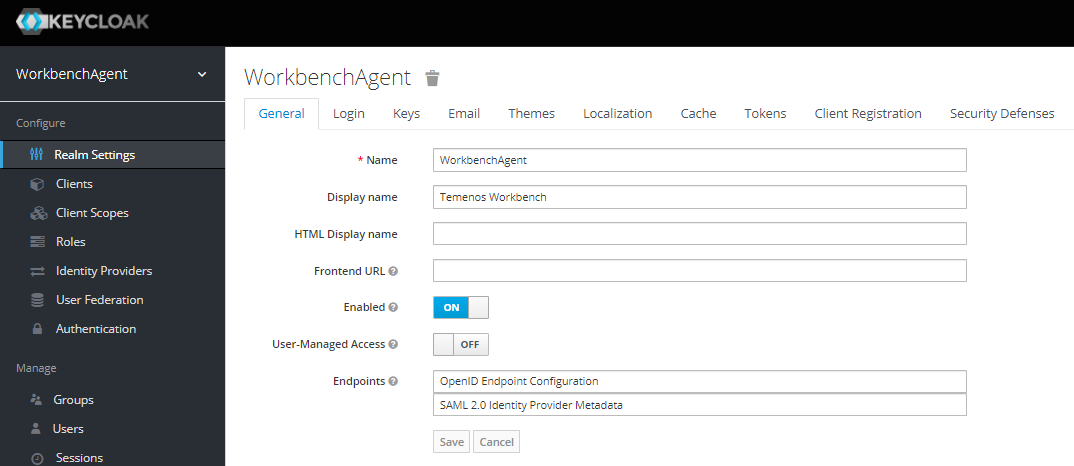
- Open the created realm and click Realm Settings > General.
- Enter Name and Display name and click Save.
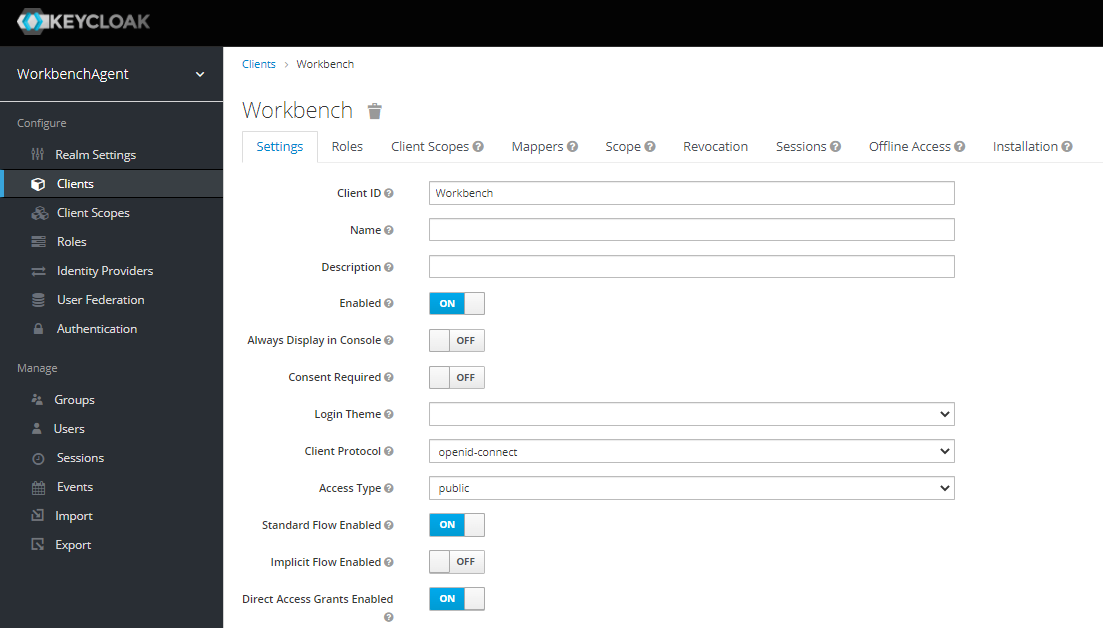
- Click Clients > Settings and enter the following values in the respective fields.
- Client ID: Workbench
- Client Protocol: openid-connect
- Access Type: public
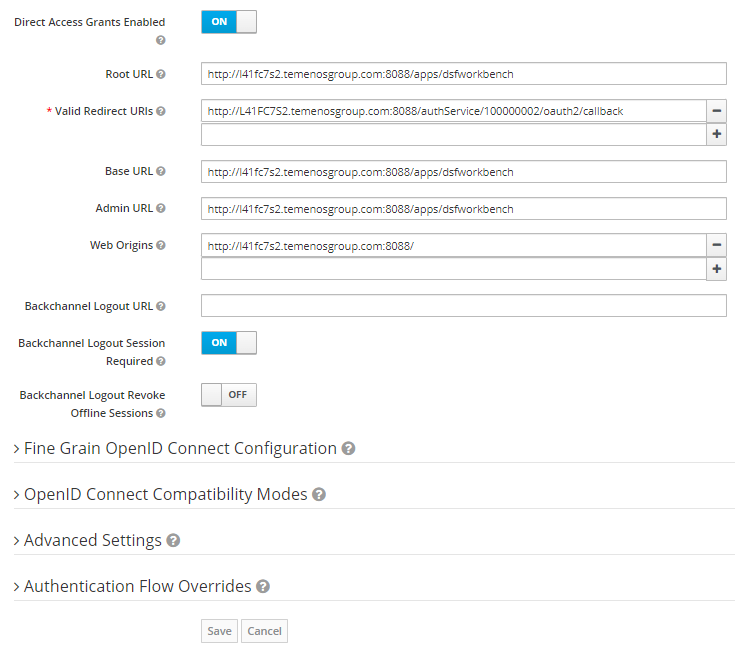
- Enter the following configurations according to the host and port you have defined in the Fabric.
- Root URL: http://<dns_name>:<port>/apps/dsfworkbench
- Valid redirect URLs: http://<dns_name>:<port>/authService/100000002/oauth2/callback. This is the URL provided by the OAuth2.0 Identity Service in Fabric.
- Base URL: http://<dns_name>:<port>/apps/dsfworkbench
- Admin URL: http://<dns_name>:<port>/apps/dsfworkbench
- Web Origins: http://<dns_name>:<port>
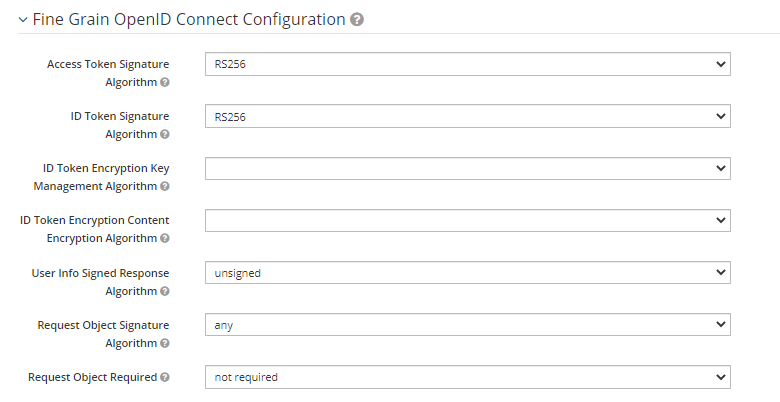
In the above configurations, <dns_name> can be hostname/machinename/ipaddress/localhost and <port> refers to the port on which your Fabric is running. - Enter RS256 in Access Token Signature Algorithm and ID Token Signature Algorithm under Fine Grain OpenID Connect Configuration.
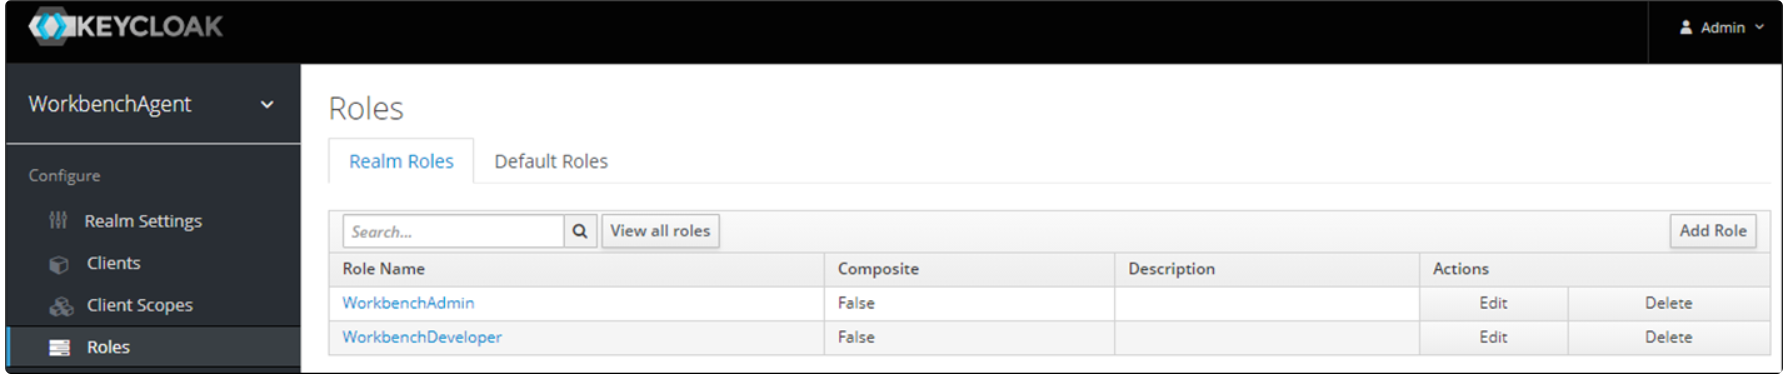
- Click Roles > Realm Roles and click Add Role.
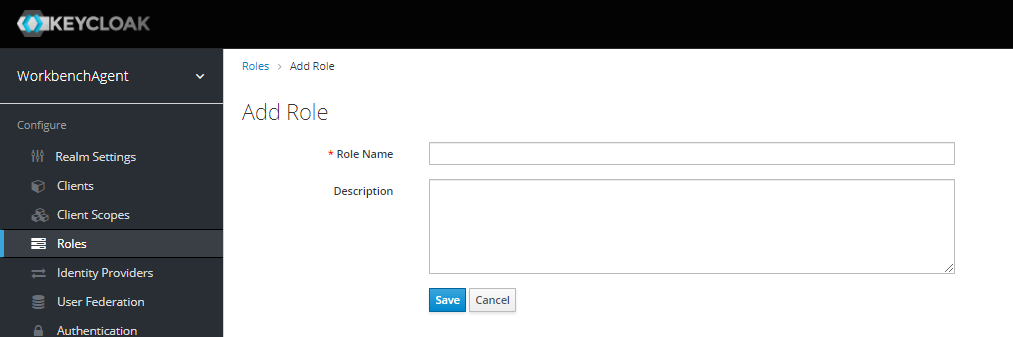
- Enter WorkbenchAdmin as Role and click Save.
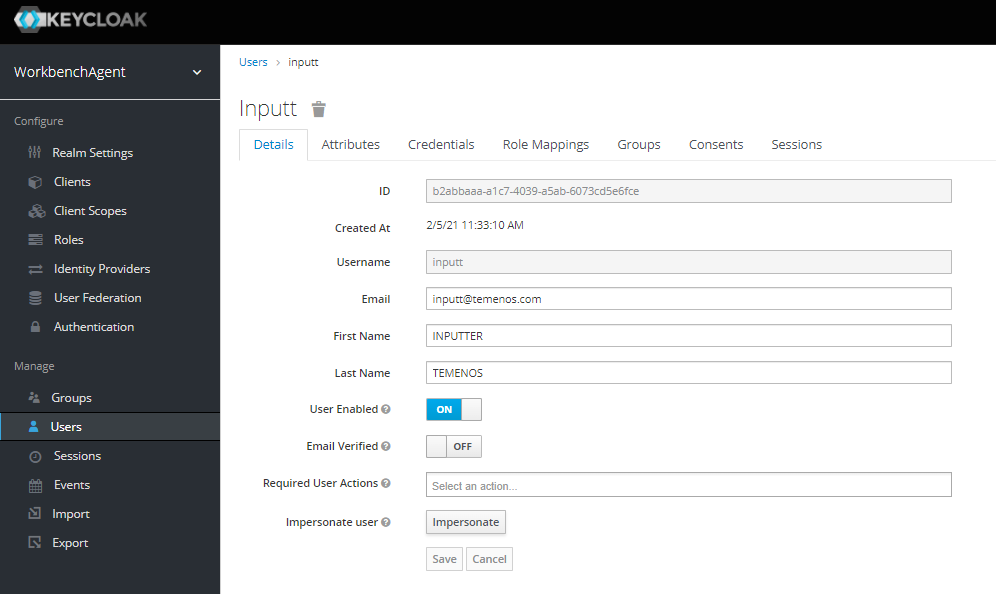
- Click Users > Details to create a new Transact user that has to be authenticated through Keycloak. For example, INPUTT can be set as the user.
- Enter the required field details as shown in the below screen capture and click Save.
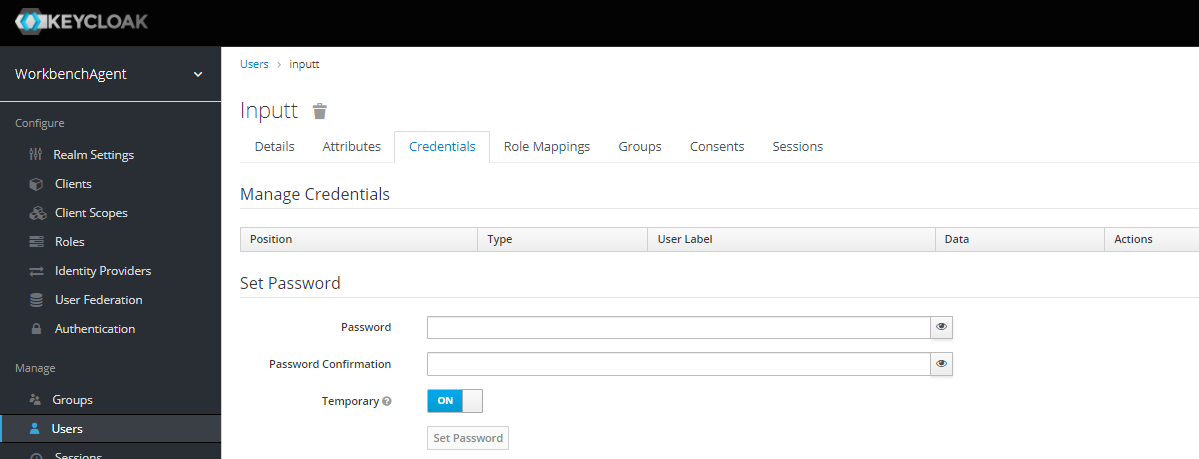
- Enter the password for the user created in the Credentials tab.
- Map the WorkbenchAdmin role to the user created in the Role Mappings tab.
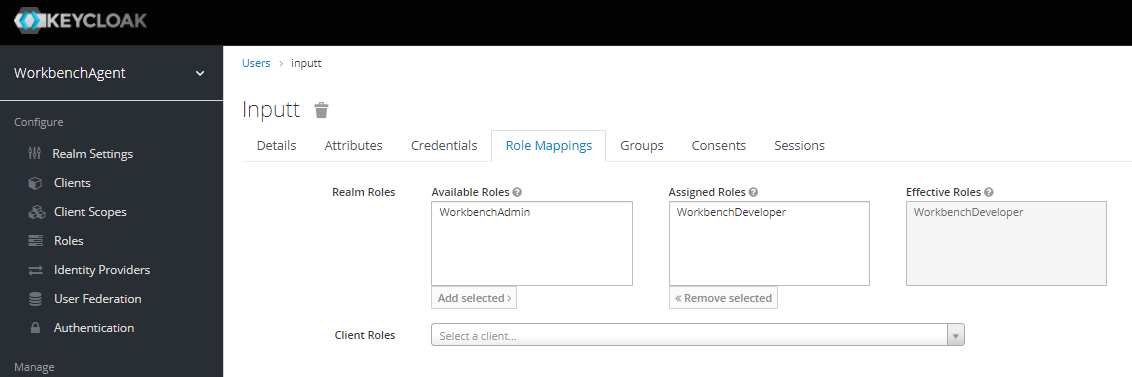
- Repeat the steps to create a developer user and set the WorkbenchDeveloper role to the user.
Keycloak is configured successfully. You can use the credentials configured in Keycloak to login to Temenos Workbench.
Keycloak for Workbench with Git
Keycloak is a standard authentication mechanism that is implemented across all the Temenos products. Read Workbench Roles for more information.
Assigning Roles to Keycloak Users
To assign a role to a keycloak user,
-
Login to Keycloak.
-
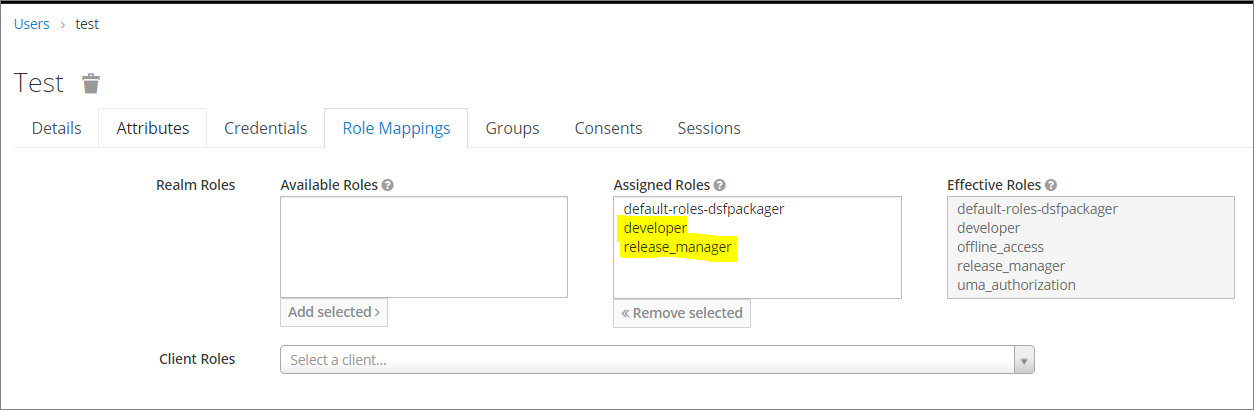
Go to Users > <<Name of the user>> > Role Mappings.
-
Select the required roles from Available Roles and add to Assigned Roles. Ensure the keycloak user role is mapped to developer or release_manager.
- Perform the following changes in the appJs.properties file.
- Ensure the values below are set.
- IdentityProvider=DsfWorkbenchKeyCloakProvider (default value is IdentityProvider=DsfWorkbenchUserRepoService)
- DsfWorkbenchKeyCloakProvider.FabricEndpointURL= http://[ipaddress]:[port]/auth/realms/DSFPackager (default value is empty)DsfWorkbenchKeyCloakProvider.FabricEndpointURL= http://10.11.12.13:8080/auth/realms/DSFPackager
- Set the FABRIC_CLIENT_ID=Workbench to change the client id of DsfWorkbenchKeyCloakProvider in fabric. Allows to pass multiple Client IDs with multiple instances.
- Ensure the values below are set.
In this topic