Comparing and Synchronizing Data Packages
This section shows how to synchronize data packages between your workspace and Temenos Transact and ensure that data records are in synchronization.
Data package synchronization
Scope
Synchronization features are only applicable in IDE.
Workspace and Temenos Transact synchronization
When you work with the IDE, the data records are stored in the workspace (file system). This means the data records can be desynchronized from the backend (Temenos Transact database). The synchronization tooling allows synchronizing the IDE workspace (file system) with the Temenos Transact database.
Use case 1: Switch Temenos Transact environment
If you are working on environment A, and then want to use environment B, then you can do the following:
- Force deploy the whole package to Temenos Transact.
- Use synchronization from workspace to Temenos Transact on a full package or selected records. Full package synchronization is the same as deploy package.
Use case 2: Modify a Temenos Transact enquiry and get changes into the workspace
Use Temenos Transact enquiry designer in Temenos Transact (or any other designer) and then use synchronization at record level to gather the latest enquiry changes.
Use case 3: Gather changes from your SCM system
When working in a collaborative way with multiple developers using the same SCM system, when you fetch the changes done by other developers, you can use the compare/synchronize tooling to only deploy to your local Temenos Transact database the changes done by others.
- Get the latest changes from your SCM system.
- Use the file comparison tooling to quickly identify all the objects that are not in-line (those that are different).
- Synchronize the changes only.
Synchronizing the package with the product using the IDE
Synchronization feature helps you check if a package is still in-line with the product. It allows you to synchronize the package content in the IDE workspace with what is deployed in Temenos Transact. The synchronization feature is supported (visible) only in the IDE.
In the upper area of the Package screen, there is a button that you can click to run a synchronization check to see if the package content in the IDE workspace is in sync with the package deployed in Temenos Transact. By default, the Last Sync Check is displayed as  .
.
Each time you close and open t-package.json or you use the refresh feature in the workspace after an update, the Last Sync Check will be displayed as .
Running a synchronization check
Below steps guide you to perform a synchronization check.
- In the Integrated Development Environment, open Data Packager.
- Click the
 (Check sync) icon.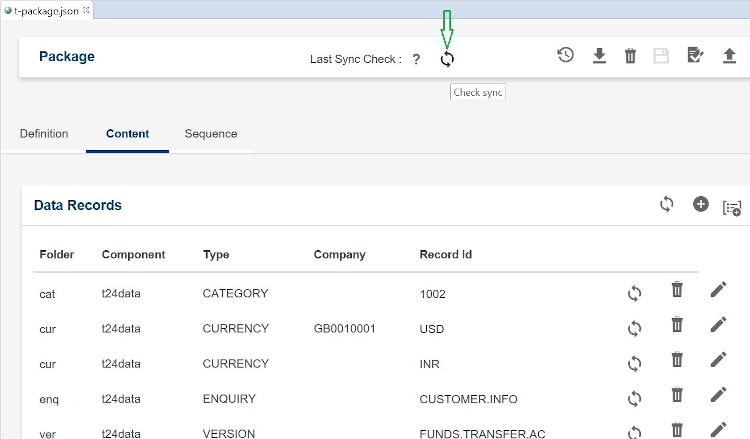
The Synchronization check pop-up window is displayed showing the total count of data records.
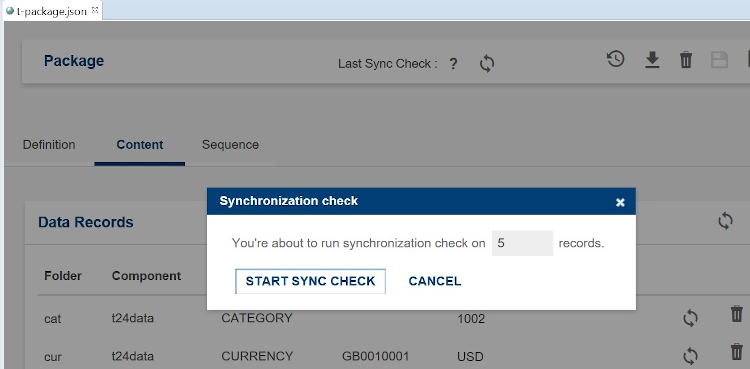
If the package is empty, you will be prompted to add records to the package content before using this feature.
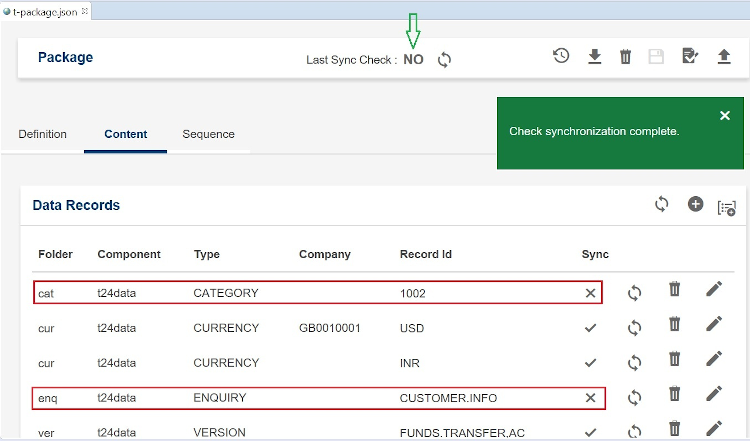
Once the synchronization check is complete, the Check synchronization complete snackbar is displayed. If all the records are in sync, The Last Sync Check will be updated to YES; otherwise it will be updated to NO.
In the content tab, a new column named Sync is displayed. At record level, the records which are not in sync are marked as
 and the records which are in sync are marked as
  .
.
Option 1: Synchronizing at package level
You can force a synchronization of your workspace from or to the product with a single click. You can also choose the direction of synchronization. The below steps guide you to synchronise your workspace at package level.
- In the Integrated Development Environment, open Data Packager. and navigate to the Content tab.
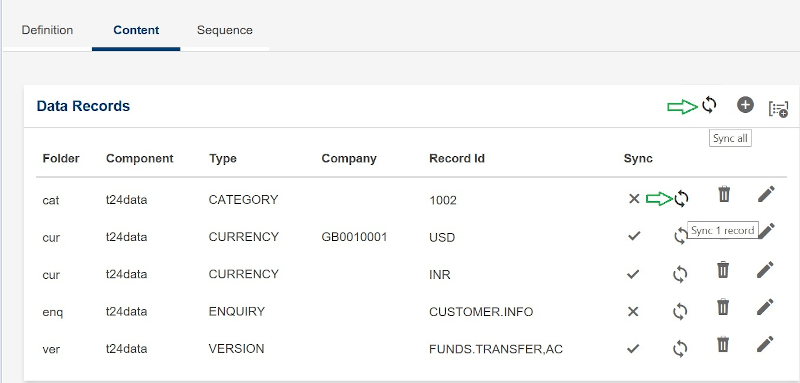
The synchronization icon is available at record level (Sync 1 record) and there is also a group synchronization feature (Sync all) to synchronize workspace with the product. By default these two icons are always enabled.
- Click the
 (Sync) icon. A pop-up window with two options opens: Product To Workspace or Workspace To Product. By default, the checkbox Synchronize also records reported in sync (slower)? is disabled and it also displays the total number of data records which are not in sync.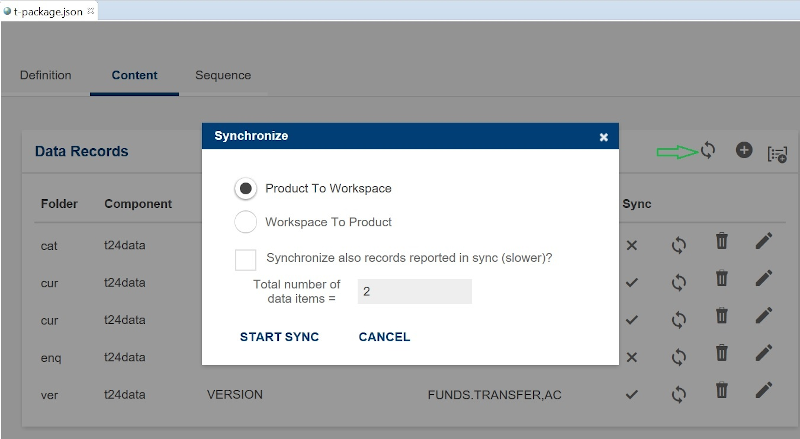
Select the check box to display all data records in the content tab including those which are in sync. It is recommended to synchronize only those records which are not in sync because the synchronization might be slower with all records.
If you have chosen Product to Workspace, all the records which are not in-line with the product get synchronized into the workspace.
- Click START SYNC. A snackbar with the confirmation message is displayed: Sync is successful for x records. As the result, the records which were not in sync get the Sync column updated as shown below.
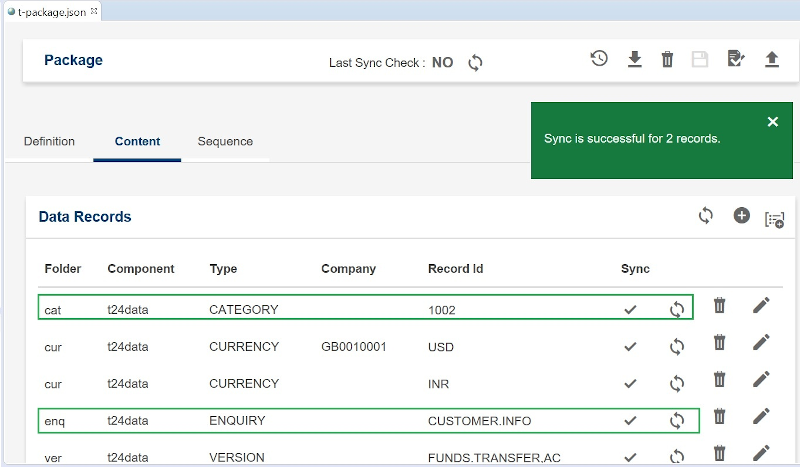
Option 2: Synchronising at record level
You can also perform synchronization at record level using the Sync 1 record icon. The file compare option will show you clearly what has been changed in the record. Follow the below steps to synchronise at record level.
- In the Integrated Development Environment, open Data Packager. and navigate to the Content tab.
- Click (Sync 1 record). A compare pop-up window is displayed. It has two panes that display the JSON content from the product (left pane) and the workspace (right pane).
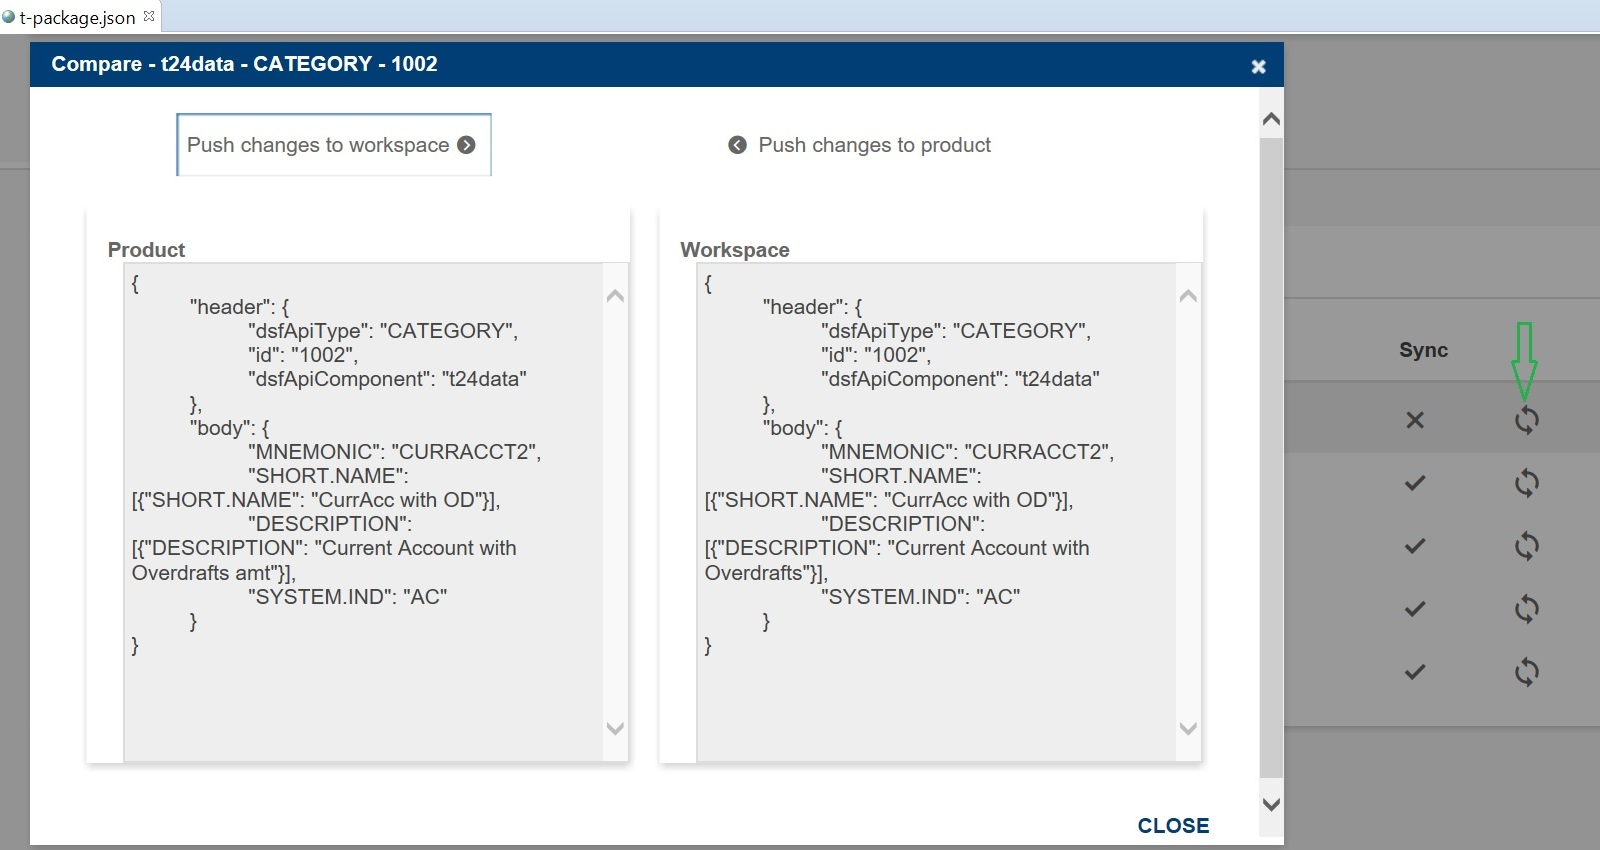
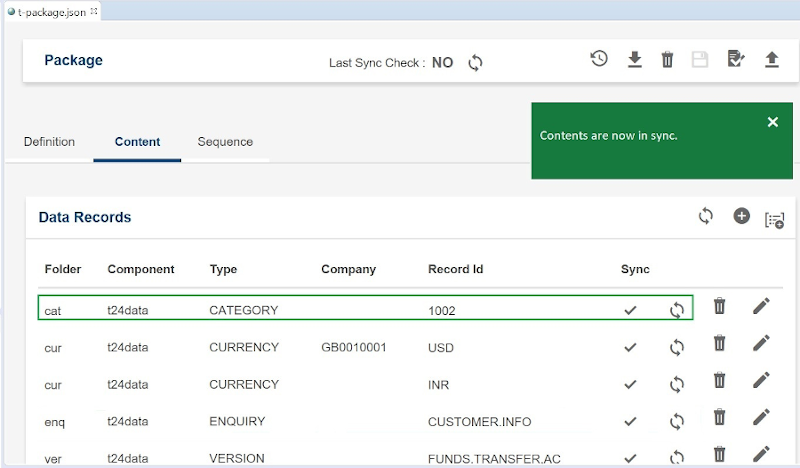
- Click either Push changes to workspace or Push changes to product. Synchronization is performed and the changes are updated accordingly along with a snackbar confirmation Contents are now in sync. As the result, the record which was not in sync will get the Sync column updated as shown below.
If you add a new data record through Add data record, CSV file, or through editing the existing data record, the Sync status will be displayed as
.
In this topic