Managing Data Packages
This section shows how to manage data records in your packages. It also tells you how to define the deployment sequence for your data records.
Package lifecycle and states
A package has two states:
- DEFINING
A package is under development and can be updated.
- FINAL
A package can only be deployed once on a server. For further deployments, you need to update the package version.
Managing Data Records in a Package
You can manage data records through the Content tab in package editor.
 Adding a data record
The below steps guide you to add a data record.
- On the Content tab, click the + (Add data record) button.
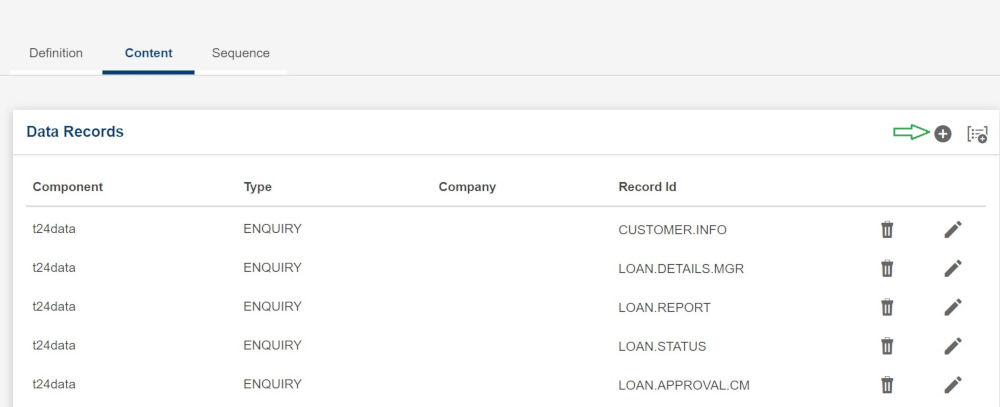
A dialog pop-up window for adding data records opens.
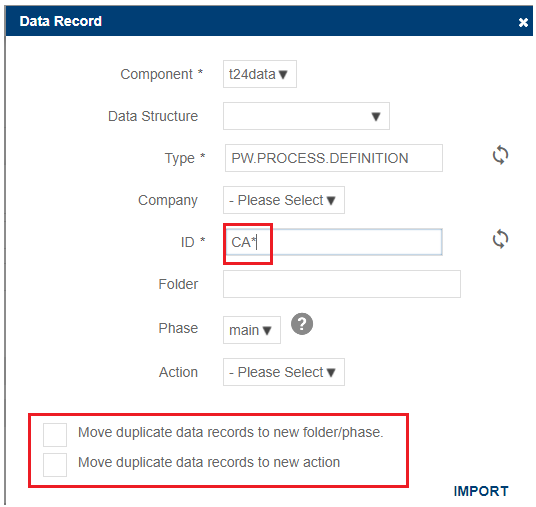
- The Component field defaults to t24data. In future, other types of data will be available (not only core Temenos Transact).
- The Type field accepts a valid application name with a content assist.
- The Company field displays the list of all available companies.
- The ID field is used to enter the record ID for the chosen application. You can also use wildcard * (asterisk) in this field to import records in bulk mode. The formats supported by the wildcard and their corresponding actions are:
- * = Imports all records for the selected application
- Characters followed by * = Imports all records that begin with those characters. For example, AA* loads records beginning with AA.
- * followed by characters = Imports all records that end with those characters. For example, *AA loads records ending with AA.
A * in the middle of a string is not considered as a wildcard. In case of duplicate records (folder/phase/action), you can select how to interact with them:
- Move duplicate data records to new folder/phase
- If checked, existing records are moved to new folder/phase.
- If unchecked, duplicates are not allowed.
- Move duplicate data records to new action
- If checked, existing records are moved to new action.
- If unchecked, duplicates are not allowed.
You can refresh the application IDs and Record IDs using the corresponding refresh icons.
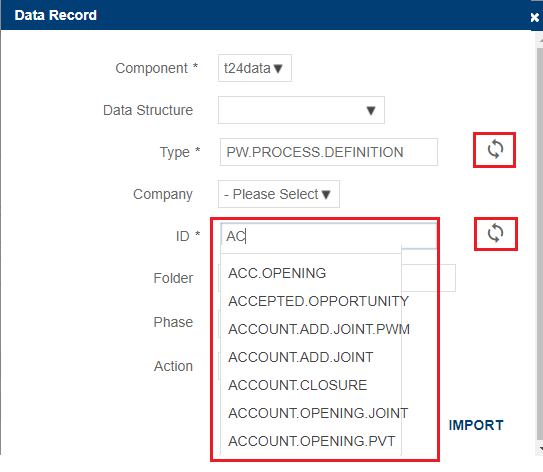
- Click Import to add the data record to the content table.
After that, you can add a new data record or close the pop-up window.
Editing a data record
The below steps guide you to edit a data record.
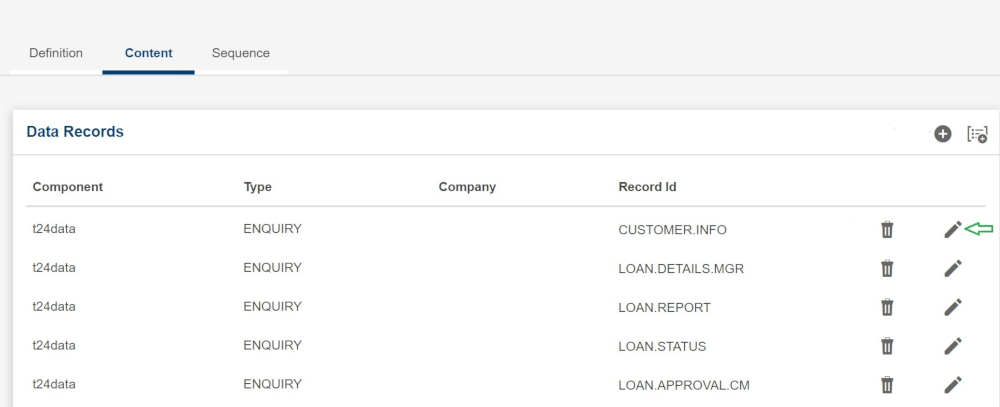
- On the Content tab, click the chosen edit button. Here edit means from a package point of view, typically, to change the record ID, not to open the record itself in edit mode. A pop-up window with an edit option opens.
- Modify the record ID or set/remove the company code.
Deleting a data record
The below steps guide you to delete a data record.
- On the Content tab, click the chosen delete icon (Recycle Bin).
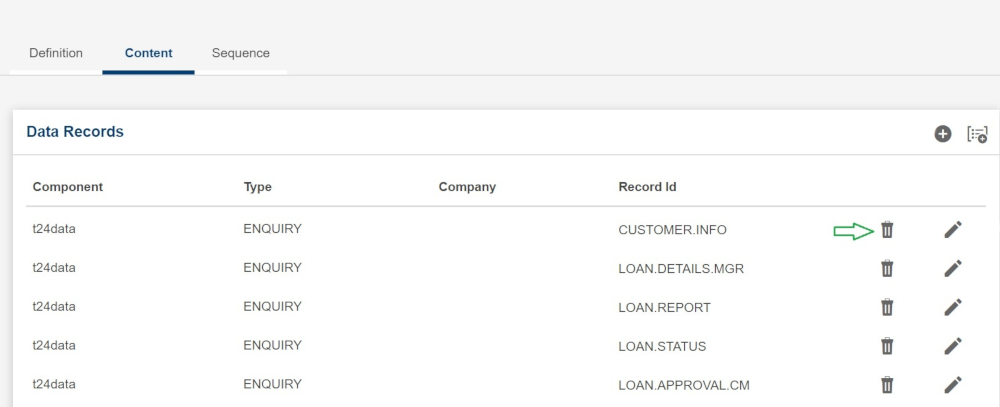
A pop-up window opens requests a confirmation to delete the record.
- Select Yes. The records gets deleted from the content table.
Managing data records in a package in the IDE
This procedure follows the same steps as in the case of creating a data record but the difference is that the package name and version cannot be modified.
On the Definition tab, you can modify either the description or the status.
Adding a record in the IDE
The below steps guide you to add a record in IDE.
- On the Content tab, click + (Add Data Record) to add a new data record. A pop-up window opens.
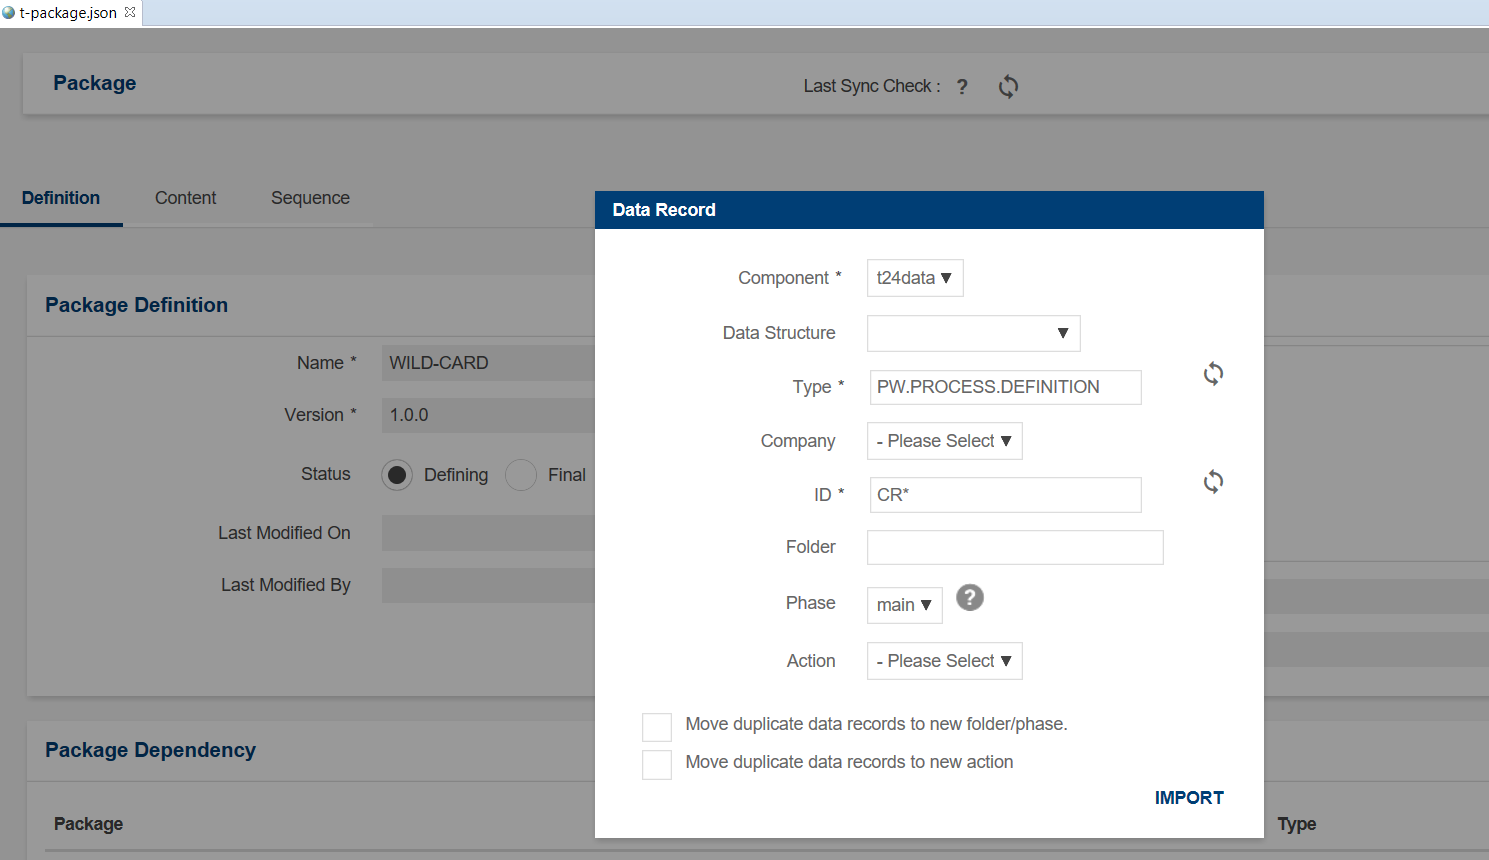
- Click Import.
You can also edit or delete an existing data record on the Content tab.
Adding data records to a package through a CSV file
You can perform a bulk import of records through a CSV file. This is useful when you want to import a large list of data records in one go.
Before you begin
- The CSV file should follow this format: Component, Type, Record ID, Company.
- The component should be t24data (in future, tapdata, t24retail, t24pw, etc.)
- The type (for example ENQUIRY) should be non-empty and takes an Application Name.
- Record ID (for example CUST*) should be non-empty and takes the full record ID of the application or wildcard symbol * to import in bulk mode. The formats supported by the wildcard and their corresponding actions are:
- * = Imports all records for the selected application
- Characters followed by * = Imports all records that begin with those characters. For example, AA* loads records beginning with AA.
- * followed by characters = Imports all records that end with those characters. For example, *AA loads records ending with AA.
- Company can be empty or not (for each line).
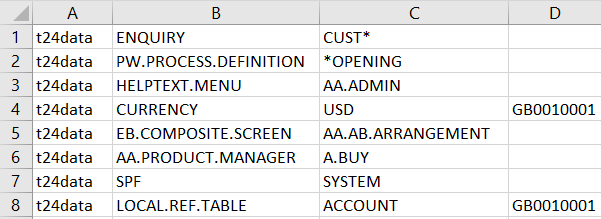
The below steps guide you to add data records to a package through a CSV file.
- Click the Import Data Records from CSV button that is in the upper-right area of the Content pane (tab).
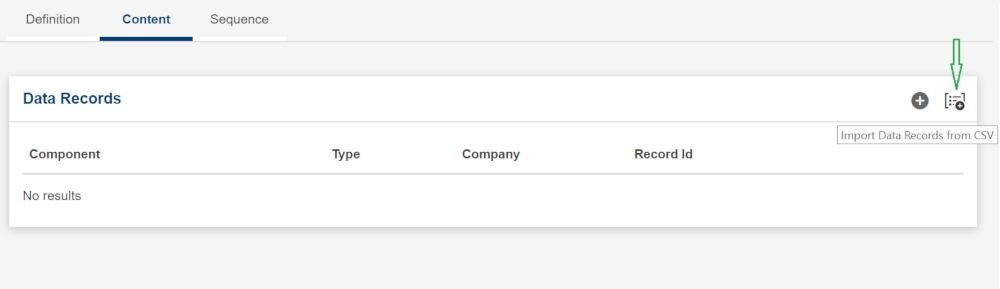
A pop-up window opens which allows you to select the chosen CSV file from the file system.
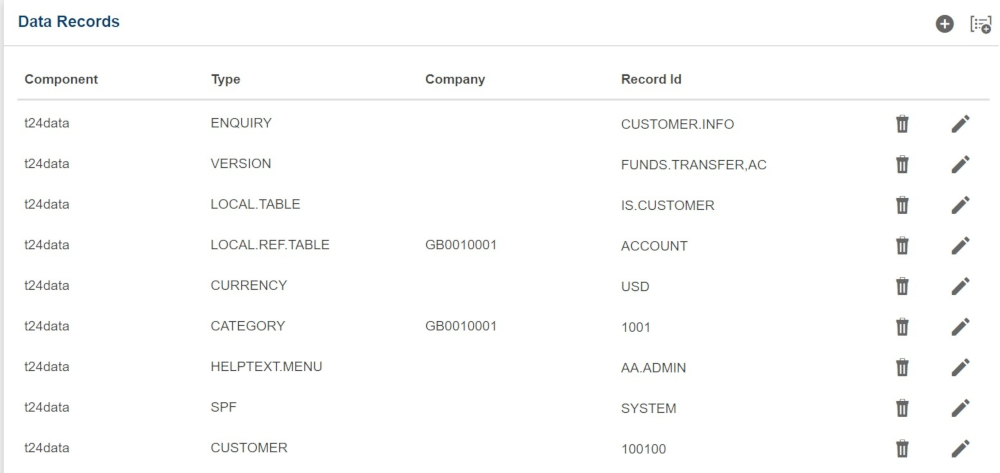
- Select the CSV file and click Open. All the records are loaded into the Data Records section.
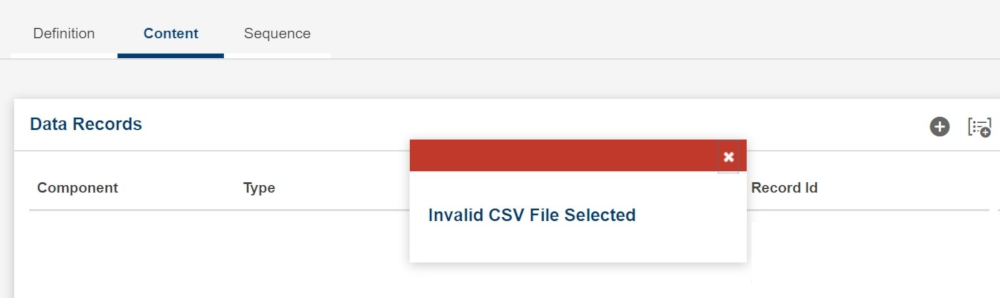
An error message will be displayed if the CSV file is invalid. For example, if the component name is not t24data, if the type or record ID or CSV file is empty, then the following import error is displayed:
Sequencing data records
This section provides details about sequencing the data records.
Package deployment sequencing of data records
The data packager uses retry strategies to manage dependencies between data records, but sometimes it's best to define the sequence in which data records must be deployed.
This is possible through data records sequencing:
- By Temenos Transact application
- By Temenos Transact data record
The retry strategy will ensure that the package will be deployed successfully if there are only dependencies issues, but having a custom sequence would allow to make deployment faster.
Defining deployment sequence for data records
You can use the Sequence tab to specify the data record deployment sequence to define the order in which deployment of data records should happen. This is to ensure that deployment is efficient and correct.
The below steps guide you to define deployment sequence for data records.
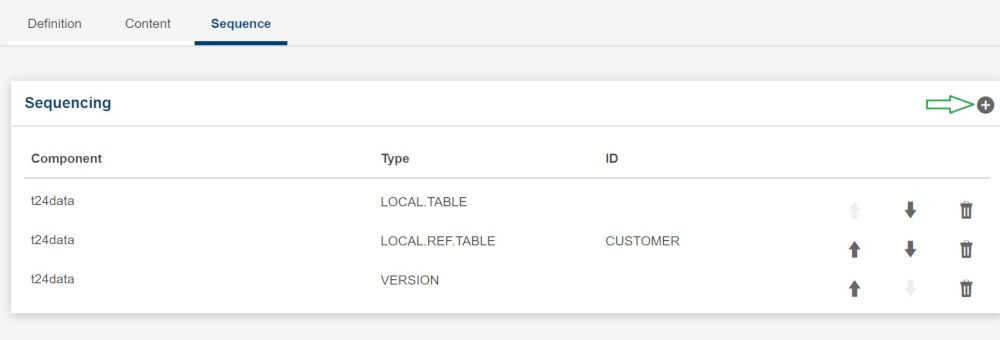
- On the main Data Packager page, click the Sequence tab and then click + to add a sequence element.
- Provide the application type to define an application sequence during deployment.
- Provide both application type and record ID to define the order of deployment of a specific data record of an application.
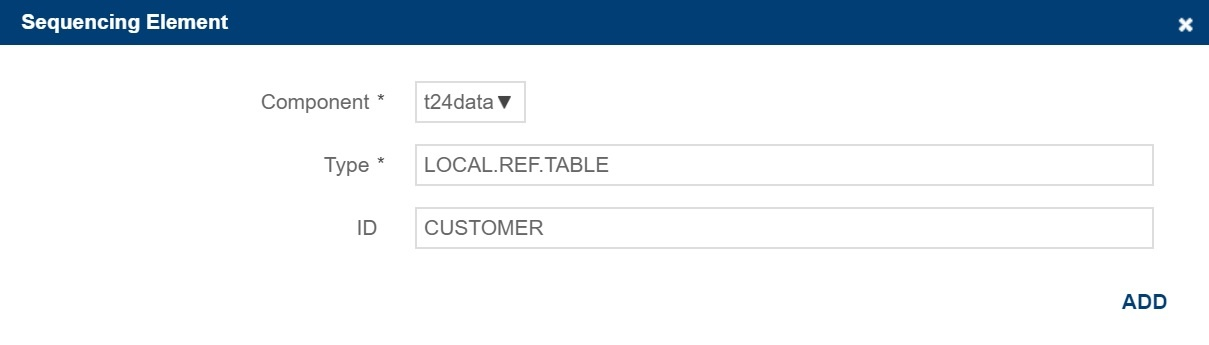
- Click Add. The sequencing element is added into the Sequence table.
- You can delete a sequencing element by clicking the Delete button.
- You can also re-order the records using the Move Up or Move Down buttons.
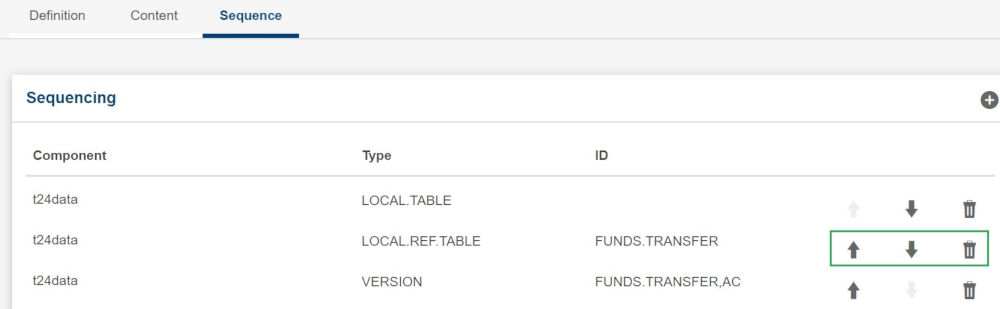
Recommended Temenos Transact data deployment sequence
Typically, the following default sequence is recommended. You can adapt it while creating your custom package.
- PGM.FILE
- FILE.CONTROL
- STANDARD.SELECTION
- LOCAL.TABLE
- LOCAL.REF.TABLE
- EB.TABLE.DATA.TYPE
- EB.TABLE.DEFINITION
- EB.API
- EB.TABLE.PROCEDURE
- AA.CLASS.TYPE
- AA.CLASS.DEFINITION
- BATCH
- LANGUAGE
- EB.RULES
- EB.RULE.GATEWAY
Validating a package
You can validate a package both in web browser and IDE mode. You can also validate a package through Maven or command line.
Package validation
It is recommended to validate a package at build time to reduce errors at deployment time.
You can trigger validation through the validation button in package editor. The validation button is enabled after the package is saved.
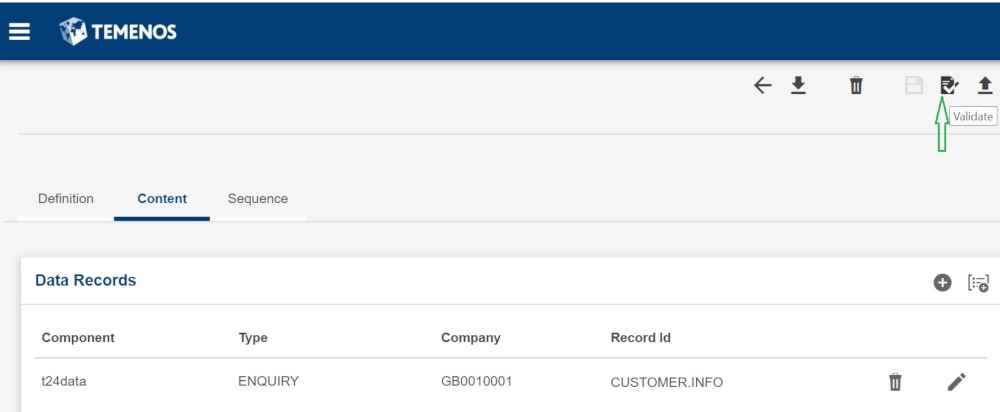
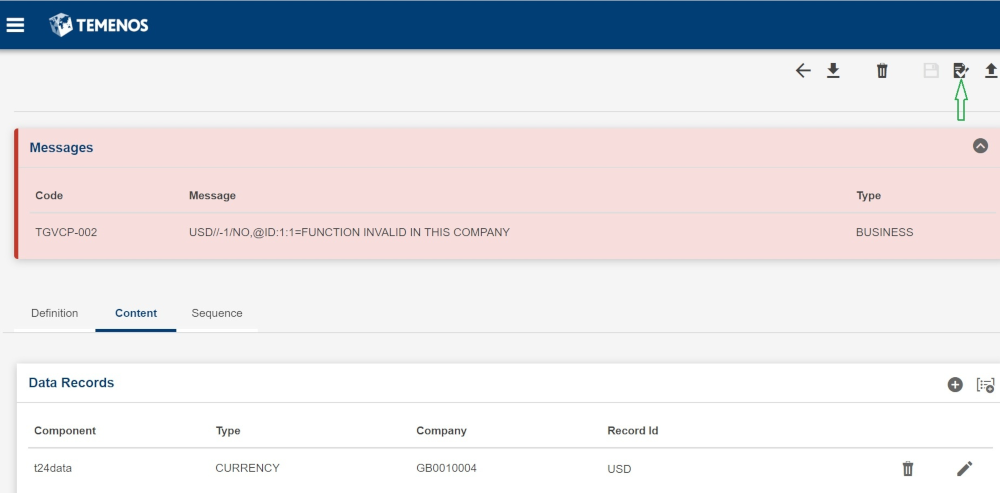
Package validation always uses OFS bulk mode without committing to Temenos Transact (only validation) with retry strategy to manage dependencies issues within the same package.
A collapsible error pane at the top of the page will be shown when there are errors after an action. Typically, this happens after a package validation.
Validating a package in IDE mode
The below steps guide you to validate a package in IDE mode.
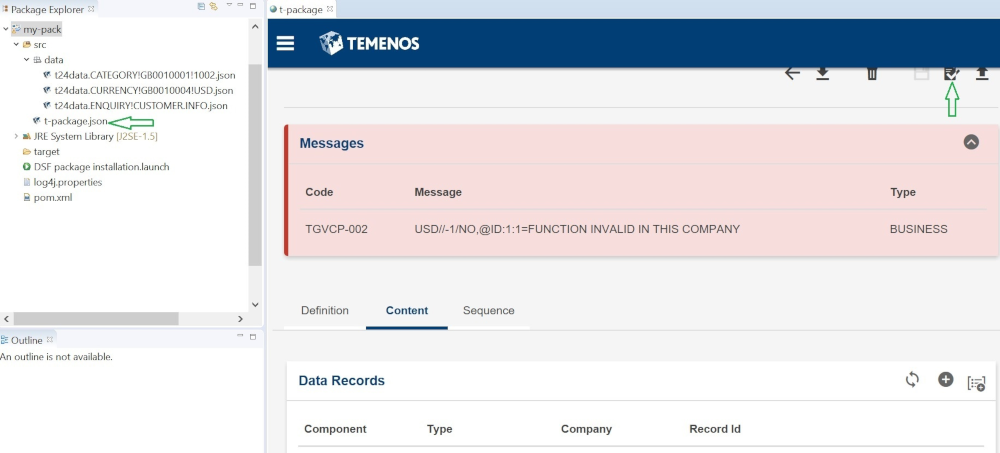
- In IDE mode, import the package zip file. Navigate to package-name/src and open the t-package.json file in Web Designer.
- Click the Validate button. In case of an error, a validation error message is displayed.
In this topic