Eclipse IDE Features
The packager aims at providing IDE agnostic features through the t-package.json editor. The IDE specific features help to boost productivity. This section deals with the functionalities performed using IDE context menus in Eclipse.
IDE Context menus
In IDE mode, there are new context menus available for importing, reloading and deploying data records.

 Import Data From Temenos Transact
You can import individual data records from Temenos Transact into IDE workspace using this context menu in either of the ways:
- Select folder, Right click > Import Temenos Transact Data Record (JSON) (or)
- Click File > Import > Temenos Workbench > Import Temenos Transact Data Record (JSON)
The following screen capture displays the import wizard.
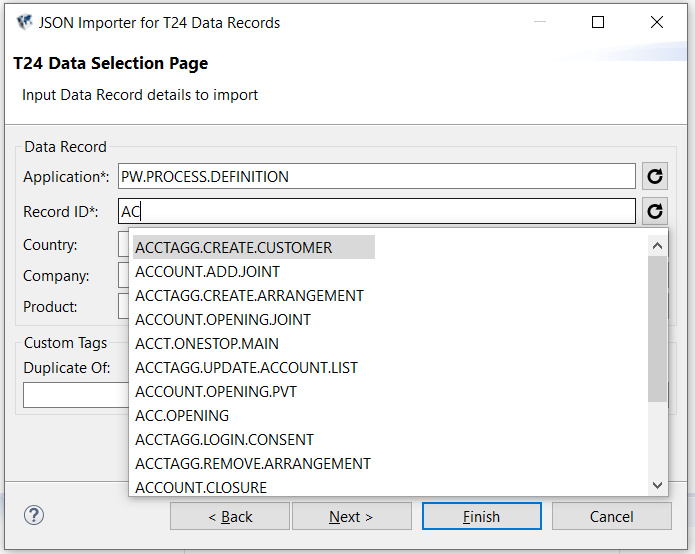
All the fields except Duplicate Of, are auto-completion text-boxes. The Record ID field is loaded based on the application selected with content assist. You can also use wildcard * (asterisk) in this field to import records in bulk mode. The formats supported by the wildcard and their corresponding actions are:
- * = Imports all records for the selected application
- Characters followed by * = Imports all records that begin with those characters. For example, AA* loads records beginning with AA.
- * followed by characters = Imports all records that end with those characters. For example, *AA loads records ending with AA.
A * in the middle of a string is not considered as a wildcard. You can refresh the application IDs and Record IDs using the corresponding refresh icons.
The Country field indicates that the imported data record will be deployed to all companies that have the same country code. If a country is specified, you need to specify a company as well. The list of companies displayed based on the country selected. This helps to have a record that is company specific or to load it from your company of choice, if used with country.
If you click the Finish button, the system displays a report with success or failure details. If the file already exists in the project, the system throws a warning that the record will be overwritten completely.
Bulk Data Record Import from CSV
You can import bulk data records into IDE workspace using this context menu in either of the ways:
- Select folder, right click > Bulk Import CSV Data Records(JSON) (or)
- Click File > Import > Temenos Workbench > Bulk Import CSV Data Records(JSON)
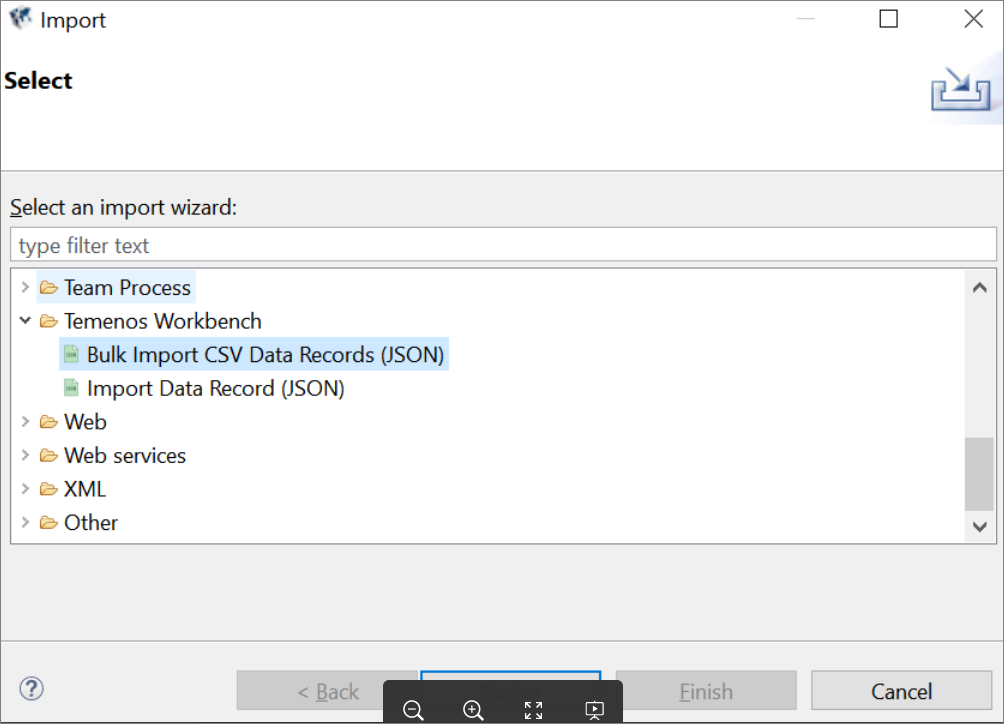
The following screen capture displays the import wizard.
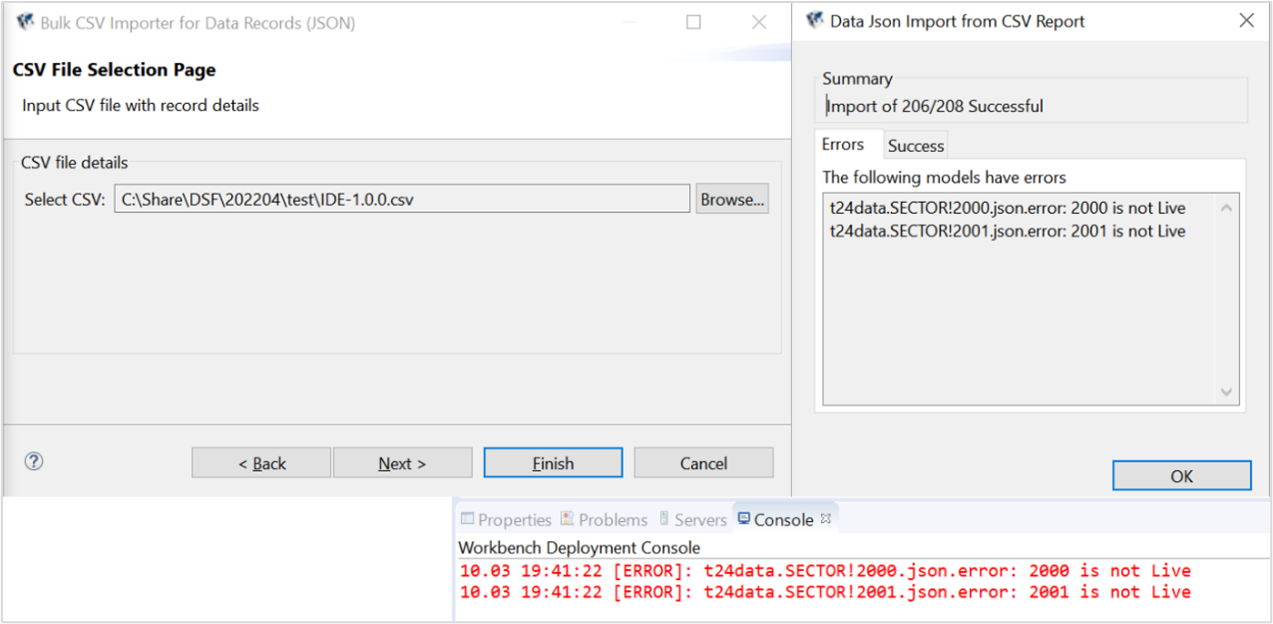
- Browse the csv.file and click Finish.
- System displays the report with success or failure details and the total number of records imported.
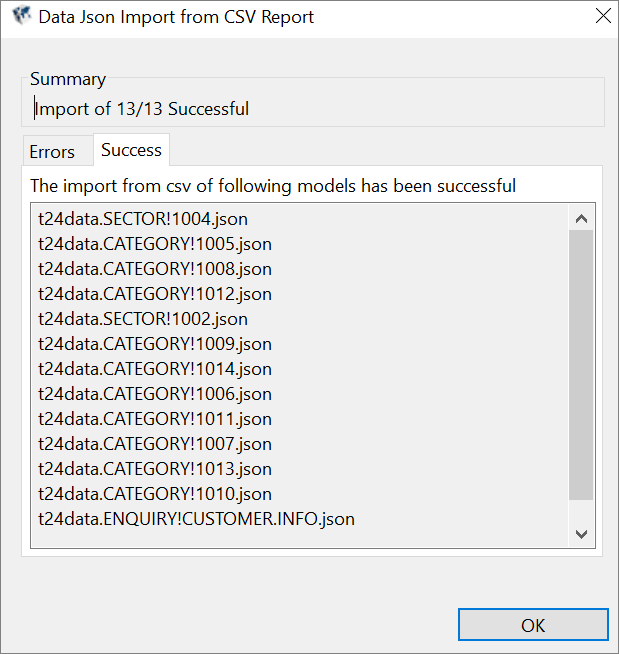
Console also shows the error details in case of failures.
Reload Data From Temenos Transact
Once you import the data records into IDE, you need not re-import them to fetch latest content from Temenos Transact. Instead, you can use context menu Reload Data Record(s) to refresh the record. You can choose this menu to reload content of a single or all JSON files within a selected folder and its children.
You can reload data records at file and folder level, using either of the following options.
- Reload Data Record(s)
- Reload Data Record(s)…
Reload Data Record(s)
You can select this menu if you want to replace the complete IDE file content with that of Temenos Transact.
Reload Data Record(s)…
You can select this menu if you want to retain custom tags, user and system variables in the IDE file content and replace rest of the content with that of Temenos Transact.
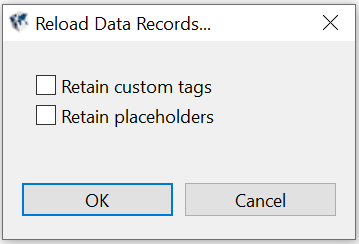
When this context menu is chosen, a dialog box appears with Retain custom tags and Retain placeholders check boxes. If you,
- Enable both the checkboxes, the custom tag section and user or system variables (if any) present in the JSON file are retained.
- Disable both the checkboxes, the custom tag section and placeholders (if any) present in the JSON file are overwritten with the content from Temenos Transact.
Deploy Data to Temenos Transact
You can use this context menu to move the following.
- Changes made in the IDE JSON file to Temenos Transact.
- Content of a single or all the JSON files within a selected folder and its children.
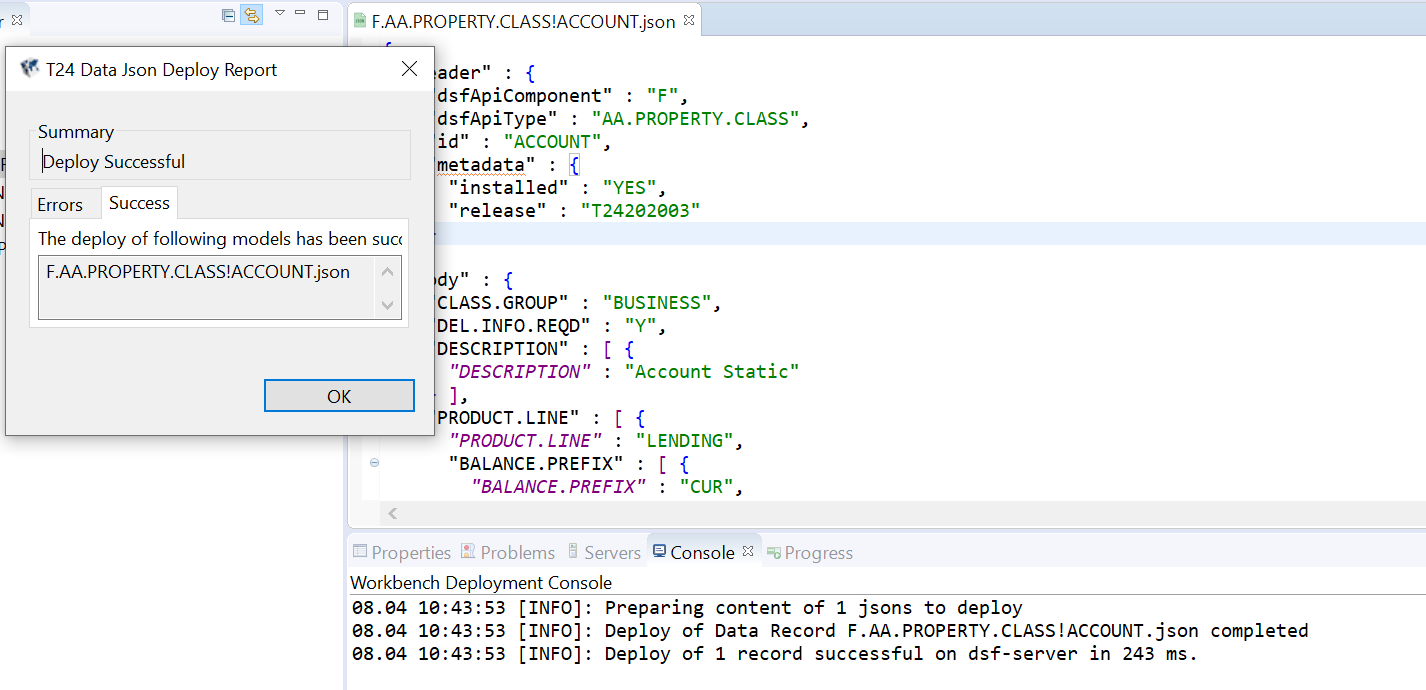
On successful deployment of a data record, the system displays a report summary and logs in Workbench Deployment console.
If a data record deployment fails, the details are displayed as a summary in report dialog, filename is highlighted in red and error details are logged in problems view and highlighted in Workbench Deployment console in red font.
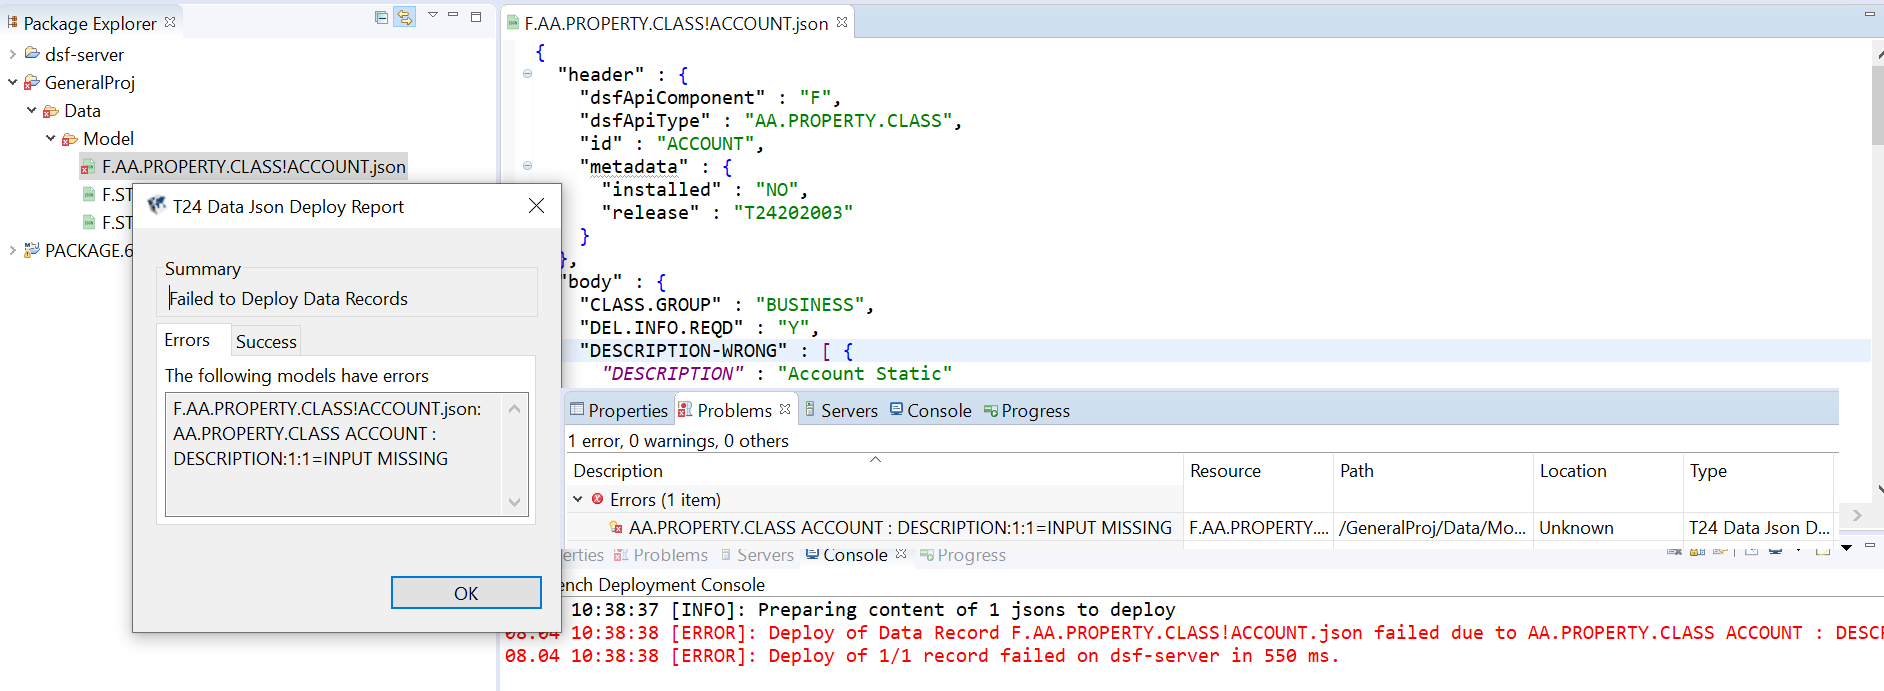
The deployment failures are captured in Problems view as one line per error. While redeploying, the existing errors are cleared first. You can also deploy the active record with keyboard shortcut CTRL+G.
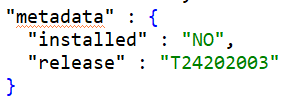
The installed tag value will be NO during import of data records and is updated as YES only if the deployment is successful.
You can also deploy country specific records, which will be deployed to all the companies that have the same local country. The records are grouped per company, when deploying multiple data records.
Deploy Workbench Automatically
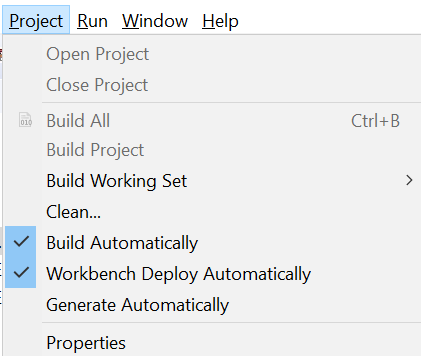
You can select the menu Workbench Deploy Automatically in Project to auto deploy data records to Temenos Transact on saving JSON files inside or outside IDE for selected projects.
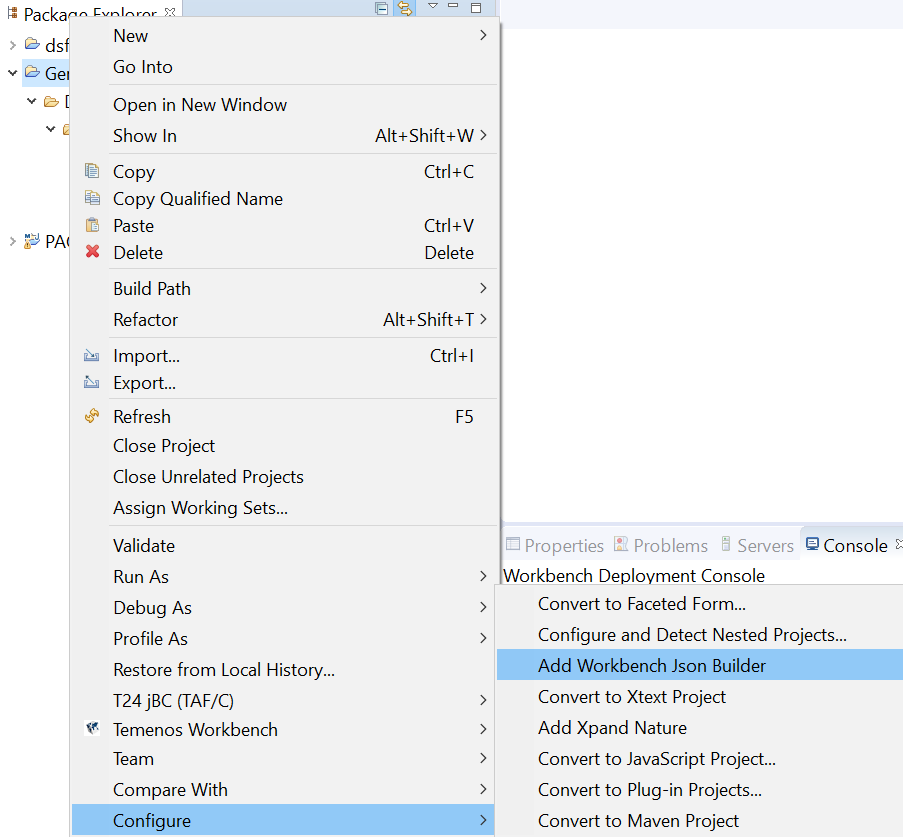
To add auto-deploy builder, you need to right click on the project where your JSON files are stored and click Configure > Add Workbench Json Builder.
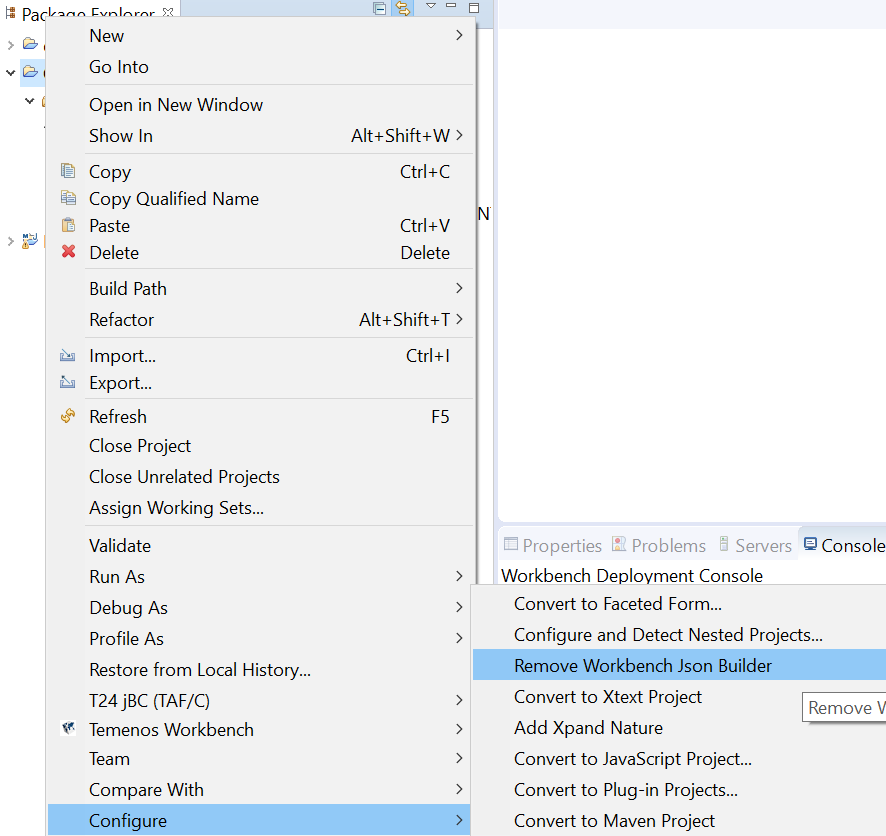
You can remove the auto-deploy builder by clicking Configure > Remove Workbench Json Builder.
The Workbench Deployment Console displays the deployment details if you add or modify a JSON file in the workspace.
In this topic